

Introduction
Chocolate Milk Caramel Swirl Whip Dessert Jar is an irresistibly creamy, layered dessert that combines the nostalgic flavor of chocolate milk with fluffy whipped cream, silky caramel, and a delicious cookie crumb layer. Served in individual jars or dessert glasses, this no-bake treat is simple enough for a weeknight dessert yet attractive enough for parties, holidays, birthdays, and special celebrations.
The magic of this dessert comes from the contrast between textures. A buttery chocolate cookie crumb forms the base, followed by a light chocolate milk-infused cream layer, ribbons of golden caramel, and an airy whipped topping. Every spoonful brings together creamy, crunchy, chocolatey, and caramel flavors.
Chocolate milk gives the dessert a familiar, comforting flavor without requiring complicated chocolate custards or melted chocolate. Cocoa powder intensifies the chocolate character, while vanilla extract rounds out the flavor. Caramel sauce adds sweetness and a buttery richness that pairs naturally with chocolate.
Because this is a no-bake dessert, it is especially convenient during warm weather when you don’t want to turn on the oven. It can also be assembled several hours before serving, allowing the flavors to blend while the layers become beautifully chilled.
Individual dessert jars make this recipe particularly appealing for entertaining. Each guest receives a neatly portioned dessert, eliminating the need to slice or plate a large cake. You can use small mason jars, pudding cups, parfait glasses, or any transparent serving container. Clear glasses are especially attractive because they showcase the chocolate and caramel layers.
The recipe is also easy to customize. Add chopped toasted pecans for crunch, chocolate shavings for an elegant finish, mini chocolate chips for extra texture, or a pinch of flaky sea salt to create a salted caramel variation. You can even replace the chocolate cookie crumbs with graham crackers or chocolate wafer cookies depending on what you have available.
Although the dessert tastes indulgent, controlling the serving size makes it a convenient way to enjoy a sweet treat without preparing an enormous cake or pie. The jars can be made in advance and stored in the refrigerator until you’re ready to serve them.
Whether you’re making dessert for a dinner party, preparing a romantic treat for two, or simply craving something creamy and chocolatey, these Chocolate Milk Caramel Swirl Dessert Jars offer an easy and visually impressive solution.
Tips
- Chill the mixing bowl and beaters before whipping the cream for the best volume.
- Use cold heavy whipping cream straight from the refrigerator.
- Don’t overwhip the cream; stop once firm peaks form.
- Add the caramel gradually so it creates attractive swirls rather than disappearing completely into the cream.
- Use good-quality cocoa powder for a deeper chocolate flavor.
- Crush the cookies finely for a compact base, but leave a few slightly larger crumbs for texture.
- Don’t pack the cookie crumbs too tightly or they may become difficult to scoop.
- Use clear jars or glasses so the layers are visible.
- Chill the finished jars for at least 1 hour before serving.
- Add crunchy toppings immediately before serving to prevent them from becoming soft.
- For a salted caramel version, add a tiny pinch of flaky sea salt to each caramel layer.
- If serving children, use smaller jars for appropriately sized portions.
Storage Information
Keep the assembled dessert jars refrigerated because they contain whipped cream and dairy ingredients.
- Refrigerator: Store covered for up to 3 days.
- Best texture: Enjoy within 24–48 hours.
- Freezer: Freezing is not recommended because whipped cream can lose its smooth texture after thawing.
- Make-ahead option: Prepare the jars several hours before serving and refrigerate them until needed.
- Toppings: Add nuts, cookie crumbs, chocolate shavings, or other crunchy toppings immediately before serving.
Ingredient Notes
Chocolate Milk
Chocolate milk provides the signature flavor of this dessert. Use chilled chocolate milk with a rich cocoa flavor for the best results. Reduced-sugar chocolate milk can also be used if preferred.
Heavy Whipping Cream
Heavy whipping cream creates the fluffy, airy texture that makes this dessert resemble a chocolate mousse or whipped pudding.
Cream Cheese
Softened cream cheese gives the filling a subtle cheesecake-like tang and helps create a thicker, richer texture.
Powdered Sugar
Powdered sugar sweetens the cream mixture while dissolving easily, preventing a grainy texture.
Cocoa Powder
Unsweetened cocoa powder intensifies the chocolate flavor without adding excessive liquid to the filling.
Vanilla Extract
Vanilla enhances both the chocolate and caramel flavors and adds aromatic depth.
Chocolate Sandwich Cookies
Chocolate sandwich cookies provide a crunchy, chocolate-rich base and a pleasant contrast to the creamy filling.
Butter
Melted butter binds the cookie crumbs together and creates a richer base.
Caramel Sauce
Caramel sauce provides the signature buttery sweetness and creates beautiful swirls throughout the dessert.
Mini Chocolate Chips
Mini chocolate chips add texture and concentrated chocolate flavor. They are optional but particularly appealing for chocolate lovers.
Chopped Pecans
Pecans contribute buttery crunch and pair naturally with caramel and chocolate. They can be omitted for a nut-free dessert.
Flaky Sea Salt
A tiny amount of flaky sea salt balances the sweetness and transforms the dessert into a salted caramel chocolate variation.
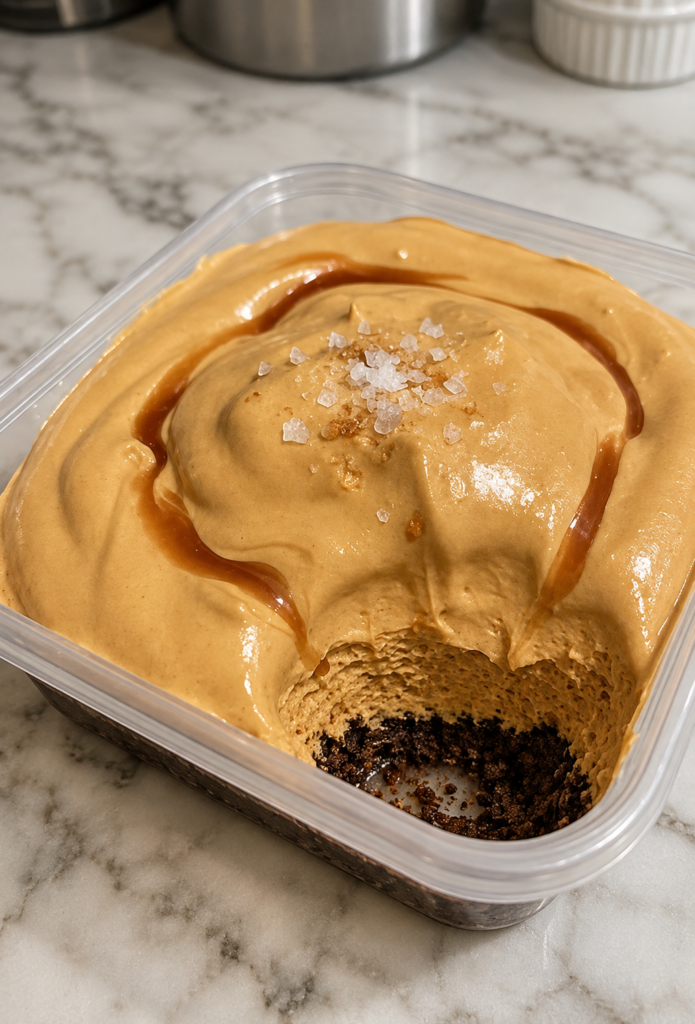

Chocolate Milk Caramel Swirl Whip Dessert Jar
Description
Chocolate Milk Caramel Swirl Whip Dessert Jar is a creamy no-bake dessert layered with chocolate cookie crumbs, fluffy chocolate milk cream, rich caramel sauce, and optional chocolate and nut toppings. Served chilled in individual jars, it's an easy and elegant treat for parties, holidays, or everyday dessert cravings.
Ingredients
Chocolate Cookie Base
Caramel Layer
Toppings
Instructions
Step 1: Prepare the Cookie Crumbs
-
Place the chocolate sandwich cookies or chocolate wafer cookies into a food processor and pulse until finely crushed.
-
If you don't have a food processor, place the cookies in a sealed plastic bag and crush them with a rolling pin.
-
You want a fine crumb texture with a few slightly larger pieces for added crunch.
Step 2: Add the Butter
-
Transfer the crushed cookies to a bowl.
-
Pour in the melted butter and stir thoroughly until all the crumbs are lightly coated.
-
The mixture should resemble damp sand and hold together when gently pressed.
Step 3: Build the Cookie Base
-
Divide the cookie mixture evenly among six dessert jars.
-
Gently press the crumbs down using the back of a spoon.
-
Don't compact them too firmly because you want the base to remain easy to scoop.
-
Place the jars in the refrigerator while preparing the filling.
Step 4: Prepare the Cream Cheese Mixture
-
Place the softened cream cheese in a large mixing bowl.
-
Beat with an electric mixer for approximately 1–2 minutes until smooth and creamy.
-
Add the powdered sugar and cocoa powder.
-
Continue mixing until completely incorporated.
Step 5: Add the Chocolate Milk
-
Slowly pour the chilled chocolate milk into the cream cheese mixture while mixing on low speed.
-
Add the vanilla extract.
-
Beat until the mixture becomes smooth and evenly combined.
-
Avoid overmixing because excessive beating can make the mixture thinner than desired.
Step 6: Whip the Cream
-
In a separate chilled bowl, pour in the cold heavy whipping cream.
-
Beat on medium-high speed until soft peaks begin to form.
-
Continue beating carefully until firm peaks form.
-
Do not overwhip the cream, as it can become grainy.
Step 7: Fold the Whipped Cream Into the Chocolate Mixture
-
Add approximately one-third of the whipped cream to the chocolate cream cheese mixture.
-
Fold gently with a rubber spatula.
-
Add the remaining whipped cream in two additions, folding carefully after each addition.
-
The finished mixture should be light, creamy, and fluffy.
Step 8: Add Mini Chocolate Chips
-
If using mini chocolate chips, gently fold them into the chocolate filling.
-
Reserve a few for decorating the jars later.
Step 9: Add the First Cream Layer
-
Remove the cookie-base jars from the refrigerator.
-
Spoon or pipe a layer of chocolate milk whip filling over the cookie crumbs.
-
Fill each jar approximately one-third to halfway full.
-
Smooth the surface gently with a spoon.
Step 10: Add the Caramel
-
Drizzle approximately 1–2 tablespoons of caramel sauce over each chocolate layer.
-
For a visible swirl, use a toothpick or the tip of a small spoon to gently drag the caramel through the chocolate filling.
-
Avoid mixing completely because the contrast between chocolate and caramel creates the beautiful layered appearance.
Step 11: Add Another Cream Layer
-
Top the caramel with another layer of chocolate milk whip filling.
-
Leave enough space at the top of each jar for whipped cream and garnishes.
Step 12: Chill
-
Cover the jars loosely with lids or plastic wrap.
-
Refrigerate for at least 1 hour.
-
For an even firmer texture and deeper flavor, refrigerate for 2–4 hours.
Step 13: Decorate
-
Immediately before serving, add a small swirl of whipped cream to each jar.
-
Drizzle with additional caramel sauce.
-
Sprinkle with chocolate shavings, mini chocolate chips, and chopped pecans if desired.
-
For a salted caramel variation, finish with a very small pinch of flaky sea salt.
Step 14: Serve
-
Serve the dessert jars chilled with small dessert spoons.
-
The ideal bite combines the chocolate cookie base, fluffy chocolate cream, and caramel swirl.
Nutrition Facts
- Amount Per Serving
- Calories 430kcal
- % Daily Value *
- Total Fat 26g40%
- Saturated Fat 14g70%
- Cholesterol 70mg24%
- Sodium 330mg14%
- Potassium 180mg6%
- Total Carbohydrate 44g15%
- Sugars 29g
- Protein 6g12%
- Calcium 90 mg
- Iron 2 mg
* Percent Daily Values are based on a 2,000 calorie diet. Your daily value may be higher or lower depending on your calorie needs.
Note
Tools
- Food processor or rolling pin
- Food-safe plastic bag, if crushing cookies manually
- Measuring cups
- Measuring spoons
- Large mixing bowl
- Medium mixing bowl
- Electric hand mixer or stand mixer
- Rubber spatula
- Small spoon
- Piping bag, optional
- Six small dessert jars or glasses
- Refrigerator
- Toothpick or small skewer for creating caramel swirls
- Serving tray
